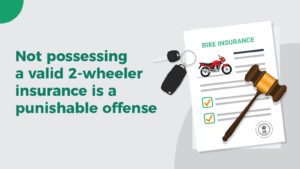
If you have a bike you must know that a two-wheeler insurance policy is a mandatory requirement as per the statutes of the Motor Vehicles Act, 1988. That is why, when you buy a bike, your dealer sells you a bike insurance plan too to comply with the legal rules. Did you know that you can also buy a policy online? Read more about Motor Vehicles Act.
Yes, the online medium has revolutionised the whole process of buying a two-wheeler insurance plan. You can buy a policy instantly in minutes if you choose the online mode. Besides buying easily, you can also compare the different plans, choose the coverage features you want and opt for the best premium rate. Thus, buying a policy online saves you both time and money. But with so many websites offering you a bike insurance plan, do you know which platform is the best?
Turtlemint is an online platform which allows you to browse through various two-wheeler insurance plans and buy a plan as per your requirements. You can choose, customize and buy a bike insurance plan easily from Turtlemint’s website. What’s more, Turtlemint also offers you help at the time of claim settlement. So, Turtlemint is one of the best buying platforms for bike insurance.
Though the buying process is easy, many get confused. So, here is a step-by-step guide of buying bike insurance through Turtlemint –
Step 1 – Visit Turtlemint’s website which is www.turtlemint.com. The home page opens which looks like this –

Step 2 – on the Home page, click on ‘Bike’ and you would be directed to a new page –

Step 3 – On this page you are required to enter your bike’s number which you can find on the number plate. If, you have a new bike and don’t have the number, you can select the link below the box– ‘Continue without the bike number’. Here’s the process both with and without your bike number –
- With bike number
You enter the number in the box and hit ‘Find Plans’. A new page appears –

Click ‘Next’ and you would be asked the details of your bike. Since the registration number is already entered, you would have to provide the model of your bike, manufacturing year and variant. Thereafter, you would have to provide the details of any existing policy you have. You have to mention the expiration details of your plan, whether a claim was filed or not, the No Claim Bonus accumulated so far, current insurance company and the type of policy you have. You can choose to provide your phone number and email id if you want the quotes by SMS and mail or you can simply see quotes by choosing ‘Show Quotes’

- Without bike number
If you don’t have a bike number and choose ‘Continue without bike number’, you would be directed to a new page which asks your RTO.

After providing the RTO, the rest of the process is same. You would have to enter the bike’s model, manufacturing year, variant, expiration status of your policy (if any), claim filed status, No Claim Bonus, current insurance company and the type of policy you have. Your mobile number and email ids are optional and can be provided if you want to receive the quotes through SMS and email. Then you would have to hit ‘Show Quotes’ to see the available plans –

Step 4 – For the IDV in the left-hand side of the page, you can either go for ‘Best Deal’ or ‘Choose My Own’. The ‘Best Deal’ IDVs are displayed already. For ‘Choose My Own’ option you would have to enter the desired IDV. There would be a range mentioned for your assistance. Once you enter your IDV, the results would be updated –

Step 5 – You can choose the available add-ons you want. Some add-ons might require you to specify the amount too.

Step 6 – There is also a discount available if you choose Voluntary Deductible. Voluntary deductible is the portion of claim which you undertake to pay from your pockets. You can choose any amount you want to. Higher the amount chosen lower would be the premium.

Step 7 – After making the necessary customizations, you would be displayed the plans. You can choose any plan you want and hit ‘Buy’ to buy that plan.

Step 8 – after you hit ‘Buy’, you would be taken to a new page. The page would display the details of your bike you entered in the left-hand side and the details would be required of the registered owner of the bike.

Step 9 – After filling the registered owner’s details you have to hit ‘Continue’ whereupon you would be asked to provide further details and the details of the nominee.

Step 10 – when you provide the details and hit ‘Continue’, some crucial details would be required. You would be asked to provide the date of registration of your bike, whether a claim was filed last year, the applicable No Claim Bonus and the expiration date of the existing policy.

Step 11 – Then you would have to provide the details of your two-wheeler.

Step 12 – Once you hit ‘Continue’, you get a message that your details are verified and you can ‘Proceed to Payment’.

Step 13 – After you choose ‘Proceed to Payment’, you would be shown the amount payable to complete the online payment. You can select any option you like, pay the premium and the policy would be issued.
This was the entire process of buying a bike insurance plan from Turtlemint. Wasn’t the process easy?
So, the next time you are buying or renewing a bike insurance plan, look no further. Choose Turtlemint and buy two wheeler policy with ease and simplicity.
Read more about Everything you should know about two-wheeler insurance policies in India


